January 2012 is almost over! Time flew by so fast I can't keep up! Do you feel the same?
Today, my brother will be leaving the country again after a wonderful week vacation for the Chinese Holidays. I feel sad but at the same time, I'm thanking God for the time we spent as a family! I'm sure there will be more bonding moments between us!
To prepare myself for the Month of the Hearts, I will be sharing a nail art tutorial with me Getting Back That Romance!
I've done several drawings from cute to crazy! Today, I will be sharing a simple nail art tutorial that is friendly for office ladies!
Keep in mind that this nail art design is not originally mine, I think I saw this design somewhere online last year and I was trying to search for this again but failed! So if you know who did this nail art design, let me know so I can link the person back :)
Step 1:
Apply a base coat of your choice to prevent your nails from yellowing. I chose a light pinkish shade from Wet N' Wild 205A Sugar Coat. Applied 2 coats and let dry.
Step 2:
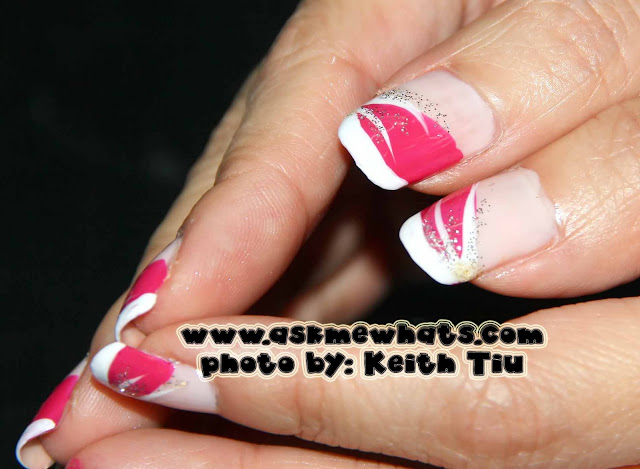
With a hot pink shade from Etude House Wannabe Style Nails, I created a diagonal line and filled in the upper tip of the nail just like on photo below.
Note: It is very important that the base coat is completely DRY so both polish won't mix up.
To those who wonder, the Etude House Wannabe Style Nails which include the hot pink shade used on photo above looks like this...
Step 3:
With L.A. Colors Art Deco Polish in White (guys! I found another place where you can buy this! Do wait for Eureka Moment soon!), create 3 wispy lines.
Step 4:
This step is optional but if you're like me who wants to create an illusion of a sparkly nail, I used L.A. Art Deco Polish in Silver and create the same wispy lines just below the white ones.
Step 5:
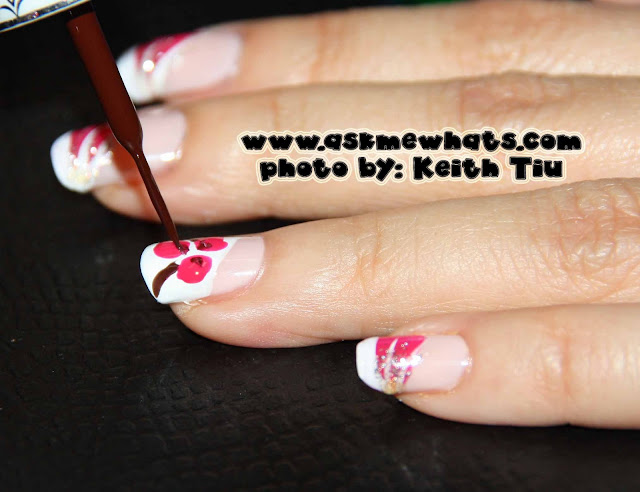
I applied diagonal hot pink tip on all nails except the ring finger, instead, I used Matte White polish and let dry. With the same Hot Pink polish from Etude House, dot 3 dots in a triangular way. Dots doesn't have to be perfect.
Step 6:
With the thin brushed Matte Brown Polish which I bought from Daiso, create branches.
At the same time, create some details on the flower petal...
Step 7:
You can attach rhinestones as petals but I chose to do it simpler by picking my Mini Bourjois gold sparkly polish and create a dot in between the petals.
Step 8:
Another optional step and you can create random lines with the sparkly silver polish.
Step 9:
Once the nail art designs are COMPLETELY dry, top with your favorite top coat.
Romance is back and let's welcome February!
Hearts' Month plus my Birthday Month! :)
I hope the combination brightened up your day as it did to me :) Happy start of the week!
Keep smilin'
Stay happy!


This is super cute and pretty!
ReplyDeleteThanks Darling, glad you liked it :)
DeleteCUUUUUTE! nikki youre soooo cute always!
ReplyDeletehahahah me or my nails? :P
Deletethat nail polish from EH is gorgeous! love the color! love your nail art too! I think I saw that Art Deco in a mall near our place?
ReplyDeleteSuper!!!! Very gorgeous talaga!
DeleteRe: Art Deco, yup! they are widely available locally na!
love this esp the ring nail! simple and sweeeeet ;) feels like i am still on CNY mode and its valentines already?
ReplyDeleteYes, this nail art is somewhere in between :D
DeleteThat's so cute and sweet!
ReplyDeleteThank you :D
DeleteGreat mani you have there Nikki..I love it..^_^..
ReplyDeleteThank you, coming from you, I am very happy!
Delete