Hello everyone! My nails missed you all! Can you imagine how I used to do different nail art designs on a weekly basis? That's almost 50 nail art designs in a year!
Since things has been super busy - very hands on mom, no house help to help me do chores so I cook a lot and work at the same time, doing nail art is a luxury!
Thankful that I have home UV gel KIT from Cathy Kathy to help me create faster and easier nail art designs with no waiting time for drying!
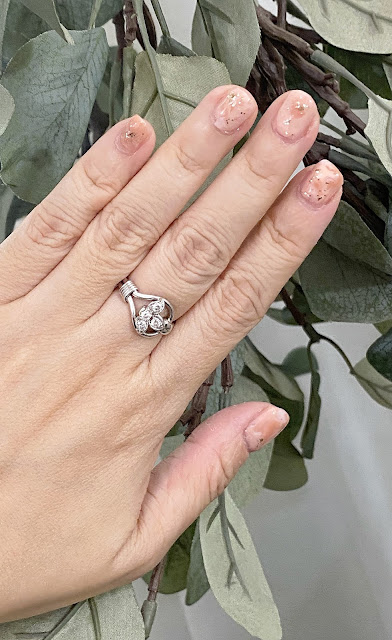
I have been checking out talented nail artists in Japan, Taiwan and Korea on my Instagram account and I got inspired to do Marble nails using gel nail polishes!
Given the chance, I’d like to do it on regular polishes more since my nails are weak and I prefer to change my polish at least once a week. But because Marble nails are quite tricky to do cosidering you need a dry base - plus busy hands on mom here! UV Gel Polish is the way to go for no.
If you do Marble nails, do not expect each nail to look uniform, some “marbling” will come off obvious while some are subtle making it a nice contrast. I also added glitters because nail art designs look 10x better with glitters - that’s my humble opinion by the way!
How to do Marble Nails using UV Gel Polish —-
Clean your nails.
Apply a base coat (cure for 30 seconds)
Apply a base color (any color you choose as base, could be light or dark). Cure for 60 seconds.
Apply a 2nd base color (do not cure), top with white gel polish and gently swirl both colors together using a dotting tool, a toothpick or any sharp tipped opject.
Once you are happy with the result of the “marbling”, cure for 60 seconds.
Add random glitters if you want.
Use UV Gel Top coat and cure for 60 seconds.\
To make it more clear, I’ve done a quick video below. Happy watching!
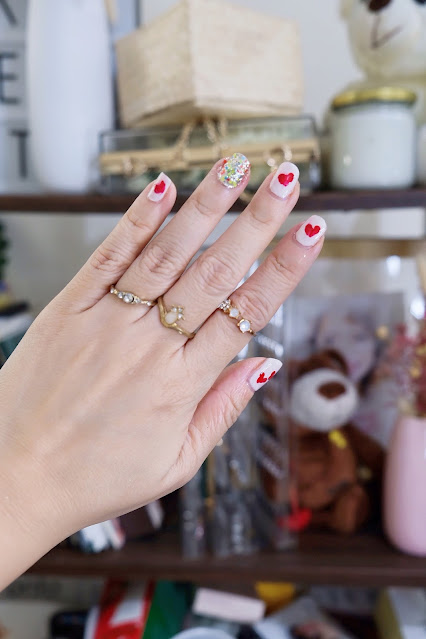
Well, I had to pair it with Valentine’s Day Nails of course!
I used Gel Polishes for this because I only have 15 minutes to create this nails and it is easier to “draw” with a completely dry base. That said, you can actually still do this with regular polishes!
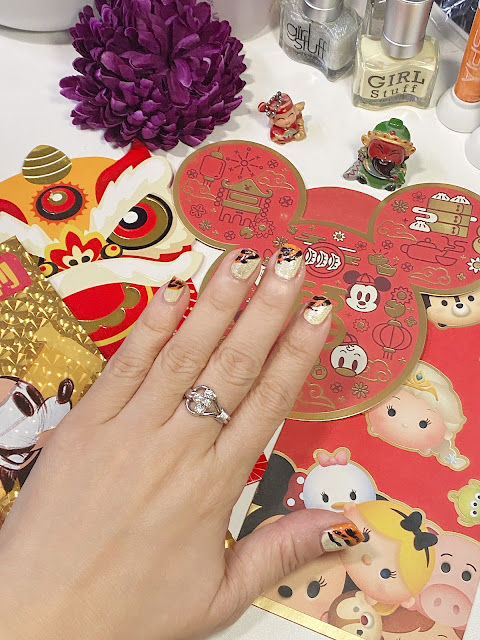
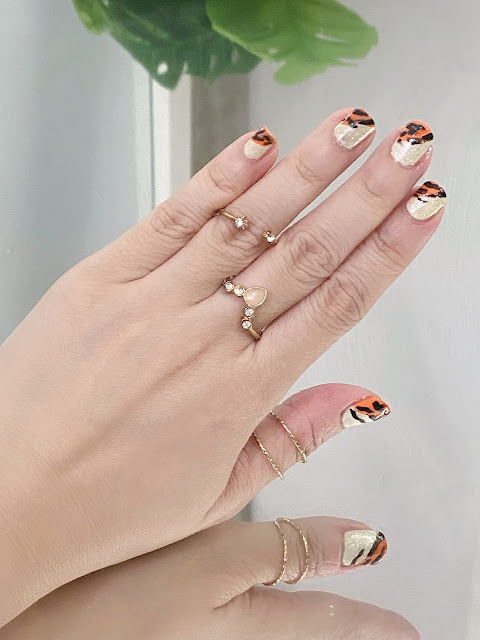
Hello AMW Friends! Happy Year of the Water Tiger!!!
Ah, as much as I’d like to draw a cute Tiger on my nails like I used to a decade ago! I’ve decided to make it simpler and …ahem…more age appropriate!
How do you like this?
My nails aren’t perfect, I haven’t gotten a chance to really buff and clean my nail cuticles —- COOKERIST here LOL! So without further excuse, here’s a better look.
Products used —-
Base Coat: ZOYA Anchor Base Coat
Girlstuff Away from It All - Light Yellow base shade
Today is September 2 and I didn’t even get to enjoy the first day of September. Things are going so crazy here at home I cannot believe the lockdown started with me counting every single minute as the days go by like a turtl. Nowadays, with Kyle’s online class starting again as 3rd grader, me cooking 2x a day for 2-3 families at times. Adding to my workout (to keep myself healthy and energetic) plus the PR work and my love for nail art, I find myself chasing after every single minute watching the clock every 5 minutes!
That said, even my nail art tutorials turn simpler, and I have been relying on UV Gel Polishes more and more because after taking this shot, I was off to do another task! And it was a task with the use of hands of course!
I recently got newer Gel Polish shades from both the Tokyo Collection and Nordic Collection, I have decided to create a simple art that screams —- CHILL. Because I need to be chill whenever I look at my nails!
I also got to try their Peel Off base and as opposed to what I did on the video, the peel off base does not need curing so I will definitely try it again without curing soon!
It isn’t perfect as I am being disturbed by my 8-year old son while I was doing this!
For the base, I found a perfect color in Cathy Kathy No Soak Gel Polish in shade 13. I used a gel polish underneath so I don’t need some waiting time to be able to draw on top of it!
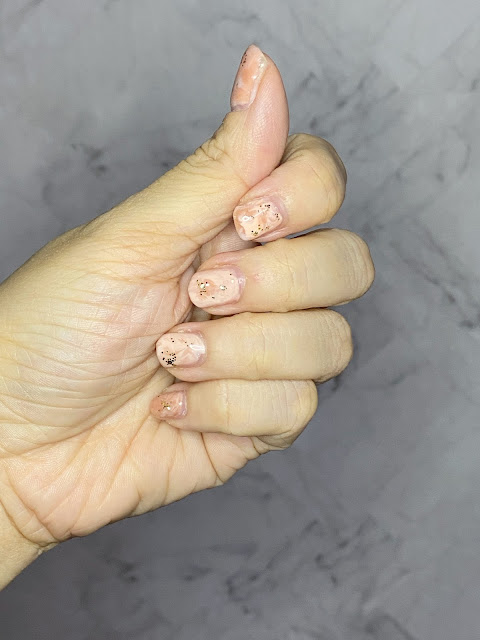
This year’s Easter, still stuck at home! Thankful that my son got used to the lockdown life and did not expect much! All thanks to many online sellers though and delivery guys, I was able to purchase plastic eggs and toys and create simple Easter Egg hunting at the comforts and safety of our homes.
Now on to my nails, I usually draw Rabbits or eggs but this time, well, for someone of age :P I’ve decided to make it simpler, thinking about the exterior look of Quail Eggs (because I just cooked them with my Birthday Noodles!) I’ve decided to use Easter Egg Pastel colors as base instead and use a simple mascara wand in creating random Quail Egg-Like dots!
If you are a long time follower of Askmewhats’ Blog, you’ll know that Nail Art plays a huge role in my life! I have been doing nail art for so many years and have done various designs!
It stopped when I gave birth to my son and I just find it hard to juggle between motherhood and nails - let’s face it, what’s the point of having cute and beautiful nails when it has to be short all the time for my baby’s safety?
Now that he is older, I am going back to doing nail art because —- you wouldn’t believe what I’m going to say —- My son actually awaits for new nail art! He would say “Mommy, where is your March Nails?”
Obviously, my son is exposed in the “Beauty World” where his mom lives in ! :)
So recently, I was contacted by the brand Cathy Kathy to try out their products without the pressure of posting! They just wanted me to try it while I record it and maybe, let them know if I like the products are not. Without the pressure - plus the products are made in Japan. I said yes because I really want to see how good “home Gel Polish” would be.
I always have my heart on regular polishes with the challenge of wet base while I do my nail art designs! I mean I always prefer the harder and hassle route #NOT :P
After trying out Cathy Kathy Gel Polishes, I COULD be a convert! Could be in a sense that I love how shiny and perfect my nails look! How easy it was to do nail art as the base coat are completely dry! How I can easily continue with my day to day activities without having to worry about smudging my nail polish!
The only downside? The exposure of UV Light! I mean the brand did say it isn’t harsh but I can literally feel the heat whenever I put my fingers inside the UV Lamp!
That is my ONLY CON! But overall, I am saying this for the brand and only brand I used as of the moment - this brand is amazing in a sense that these are SOAK FREE! I dislike Gel Polishes because of bad experience with soaking and removal - my nails were PAPER THIN when it was supposed to be done professionally but they obviously didn’t know what to do!
With that scare, I swore of Gel Polishes forever and this brand changed that! They have Nail Polish Remover that can remove gel polishes with NO SWEAT.
Best of all, I’ve had this nail art for a week now, I cook, wash the dishes and do a lot of stuff and it remained fresh as freshly applied! No Chipping (as long as you apply them well!)
I won’t blab more, watch my quick and easy-to-understand tutorial coming from someone who was literally using this KIT for the VERY FIRST TIME!
Can’t wait to use more of these products and create more art for you guys!
What can you say about my FIRST EVER GEL POLISH applied at home?
For more information follow Cathy Kathy on Instagram
Sorry for being late in my Nail Art Game! I mean, it is technically still Year of the Ox so I have the whole year to create Moo-nails! Hahaha
I have been so busy this whole February - Chinese New Year, Birthday, Final Exams for Third Quarter for my son and a whole lot more! That said, I was able to finally sit down one evening and stay up until 1:30am because my son has a 4-day break!
I have to be honest, my nail aren’t on tip top shape for so many reasons - cooking, washing of dishes and a whole lot more! So please bear with me.
For this particular nail art I used the following:
Girlstuff Nail Hardener as base
Orly Happy & Healthy Nail Lacquer (Light Pink base)
Orly Barely There Nail Lacquer (White base)
2 Way nail art pens in Black and White
Sally Hansen Tip Gypsy (Medium Pink) for design
BarryM Base and Top Coat used as top coat
Here’s quick video on how I created the nail art!
Hope you liked this simple art as much as I enjoyed making this!
Looking back, I used to do nail art on a weekly basis - both finger and toe nails! Gosh, how busy can motherhood be!!! VERY!
Fellow moms would understand.
Now, I have grown, I have matured, my nail art designs are more laidback, casual and not as wild as those that I’ve done in the past but I am not closing my doors.
I hope you like this simple art. I like using “Collection” in terms of choosing the right colors because 99.9% of the time, they work!
Video here! Hope you like and subscribe my simple channel which I dump all my videos there so it isn’t professional looking but I’ve done everything with my heart and soul!
Are there still any? Please comment below if you still love doing nail art designs or prefer to use nail polishes as is!
As for me, I’ve toned down my nail art designs, not as colorful and cartoon-like as before but that does not mean I won’t go back to that route in the future.
Since I am mostly busy with housework and work in general, I’ve transitioned to simpler nail art designs that can be done in 15 minutes max! This is my newest creation to celebrate the holidays! We are all doing ZOOM celebrations as of the moment but still I want to have gorgeous nails!
My nail art was inspried by this particular polish from Orly available locally via PureBeauty
I haven't done my nails for so long, after fixing and organizing my nail polish collection, I was inspired to create a simple nail art because there are 2 holidays for Kyle in school (meaning, I have more time to sleep late :P)
Inspired by Barry M's newest polish shade, I used it as a base and got inspiration by making mistake! I was supposed to create 3 dots and use a dotting tool for swirly art but the drops came out really good so I just let it be and enjoyed this carefree nail art!
Hope you visit and support my video and don't forget to subscribe to my channel as well!
All brands mentioned on photo and shade names.
How do you like this simple Accidental Nail Art? What were you reminded of seeing this art?
I wish I've done a video on ALL my nail art tutorials because I missed seeing how I fumbled and had a hard time doing all those crazy strokes!
I just knew I love doing it and I love seeing the results! And it's never too late to say: "You're caught on video!" I can't wait to re-watch these when I'm older!
Year 2020! I am ready for you! After keeping my nails low-key for weeks, I am ready to share to you another simple yet really cute Nail Art design that makes me smile whenever I look at them!
Polishes Used:
Girlstuff Nail Hardener
Orly Breathable Treatment + Color in shade Nail Superfood
I am inspired to create holiday inspired nails and since it's the Halloween, I thought of creating a cute Mummy nails. Cute because my son checks out my nails and I don't like him to get scared with gory looking nails! Maybe when he gets older, as for the coming years, expect cute ones :D Hope you like it!