After FIVE LONG years, I've finally posted a decent Nail Art Tutorial post again!
I can't promise this to be a regular thing but for sure, I'm getting my "mojo" back as I'm loving my nails every single time I look at it! (Iba ang good vibes ng naka nail art! In My case!)
It was one unexpected evening that Kyle got tired and slept earlier than usual. I've decided to clean my toe nails and finger nails! Since they are clean na, I looked into my nail polish collection and decided to create a quick and very simple Nail Art Design that represents me the most --- DOTS!
My friend Janina told me she tends to wear Polka-dotted outfit when she knew she's meeting me --- so I must be a DOT to her? :P
I picked a polish from the Orly Breathable Treatment + Color Collection and I picked the bright red shade called LOVE MY NAILS as base --- that explains the title of this nail art tutorial!
Step 1:
Apply 2 coats of Orly Breathable Treatment + Color in Love My Nails. Wait for it to completely dry before you apply the design.
Note: There are some nail art designs that need a wet polish base, not this one though.
Step 2:
I missed my Prettynails 2-Way Nail Art Pens (Yes, I used to be a supplier a decade ago) Since I stopped selling them, I had to purchase some in store and got this one from the brand OMG at Watsons.
Using the "Brush" applicator, create 2 lines on the ring finger.
Step 3:
Using the "dot" side, create dots in between the lines as shown below. You can create small dots or big dots, depending on your nail length and preference.
Step 4:
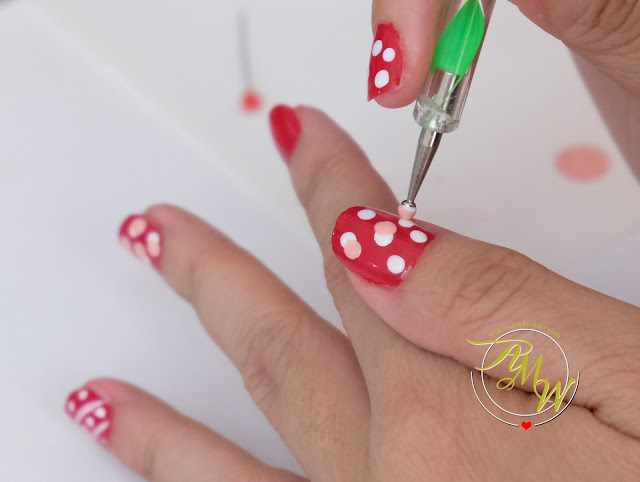
This time, using a dotting tool, create bigger dots on Middle Finger and Thumbnails. You don't have to fret the placement of the dots, it has to be very random.
Step 5:
Picking my favorite baby pink shade from Girlstuff Summer Collection called BAEWatch, use this as a "second dot" to be applied randomly on top of the white dots.
Leave a bit of the white dot shade in half, imagine how Lunar Eclipse goes? Same thought (or was I just too into Solar System nowadays?) hahaha!

Step 6:
Using the other side of the dotting tool (which can create smaller dots), use the same shade BAEWatch this time, apply on pointer fingers with smaller dots as shown on photo below.
Same goes for the pinkie fingernail.
Step 7:
Make sure the designs are COMPLETELY dry before you top it with your favorite Top Coat. Mine will always be Girlstuff Fast Dry Top Coat! This is a huge help for busy moms like me or those who can't wait for their nail polish to dry! This takes around 5 minutes flat! And you're ready to go!
Make sure the designs are COMPLETELY dry before you top it with your favorite Top Coat. Mine will always be Girlstuff Fast Dry Top Coat! This is a huge help for busy moms like me or those who can't wait for their nail polish to dry! This takes around 5 minutes flat! And you're ready to go!
VOILA!
Was able to finish this in 10 minutes flat! I love how my nails look right now --- so Nikki!
How do you like my comeback nails?
Do you like more nail art tutorials featured here?
For more inspirations and past nail art designs, visit HERE.
Keep smilin'
Stay happy!
Stay happy!


Nice ang cute! 😍
ReplyDeleteThank you sis :D
DeleteWow.. 10 minutes lang!! Galing naman! Maghanap nga ako nyang girl stuff nail polish. Mahilig din ako mag lagay ng nail polish kaso nga lang it takes forever to dry hehehe! Eh di pde pag may makulit na anak, ang ending laging may sira kaya need iretouch 😅 please do more nail tutorials po. Kahit sa IG story lang. 😊😊😊
ReplyDeleteSis, mabilis lang mag dry kasi the Girlstuff polishes and the top coat :D Give it a try and they aren't expensive :D
DeleteI will try to do more tutorials, thanks for appreciating :D
Ang galing! Wish I had skills like that <3
ReplyDeleteThe Ultimate Skin Whitening Guide
Filipinow | The Modern Pinay's Nipa Hut of Beauty
naku practice lang! :D
DeleteYour nails are back!
ReplyDeleteYAAASS GIRL!
Delete