*Angry Birds song playing*
I can literally hum the Angry Birds tune anytime of the day! I actually finished the game that's why I knew the faces of the characters by heart! After a bit of push from Mr. AMW (who loves Angry Birds too), I finally gave in to try out my own version of Angry Birds on Nails! I hope I gave justice to the characters!
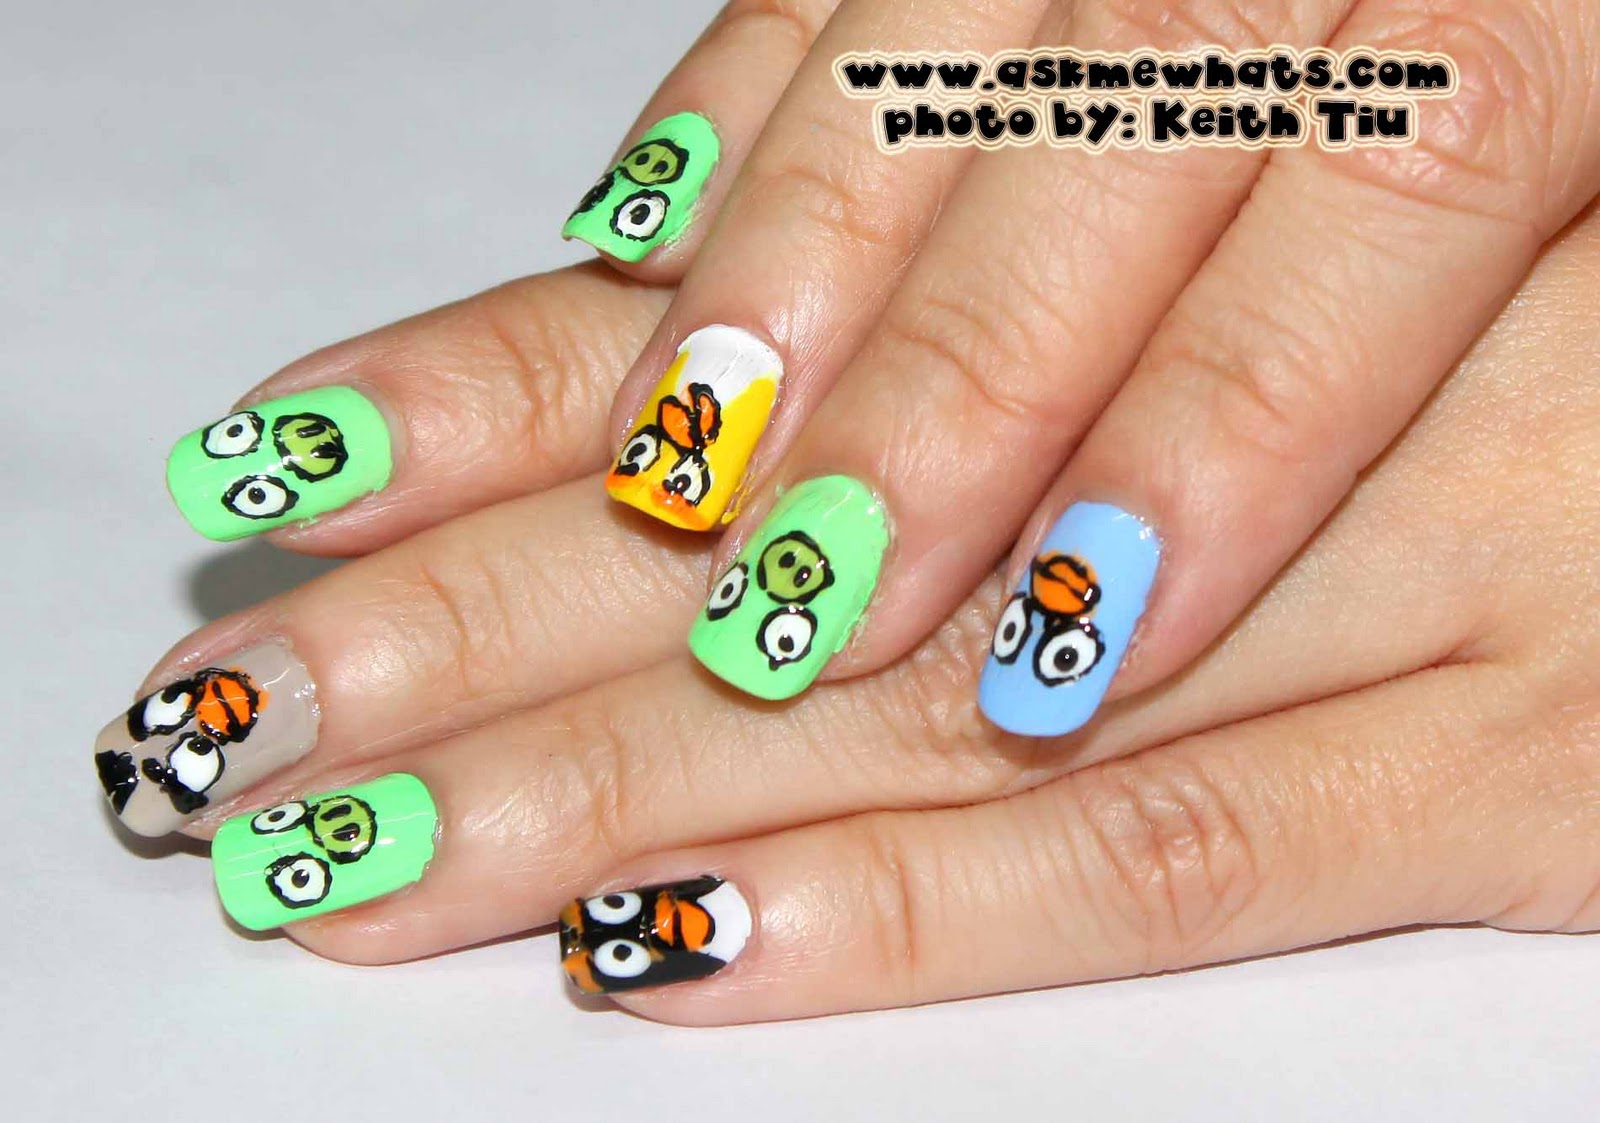
To those who are not familiar with Angry Birds, here's their family photo!

Here are the main characters ---
Yes, they are friends in this photo, wait till you see the bottom part of this post!
Step 1:
This looks crazy but you'll get why I strategically arrange the colors to be this way. Applied 2 coats of each shade with a nice base coat to protect my nails.

These are the polishes I've used

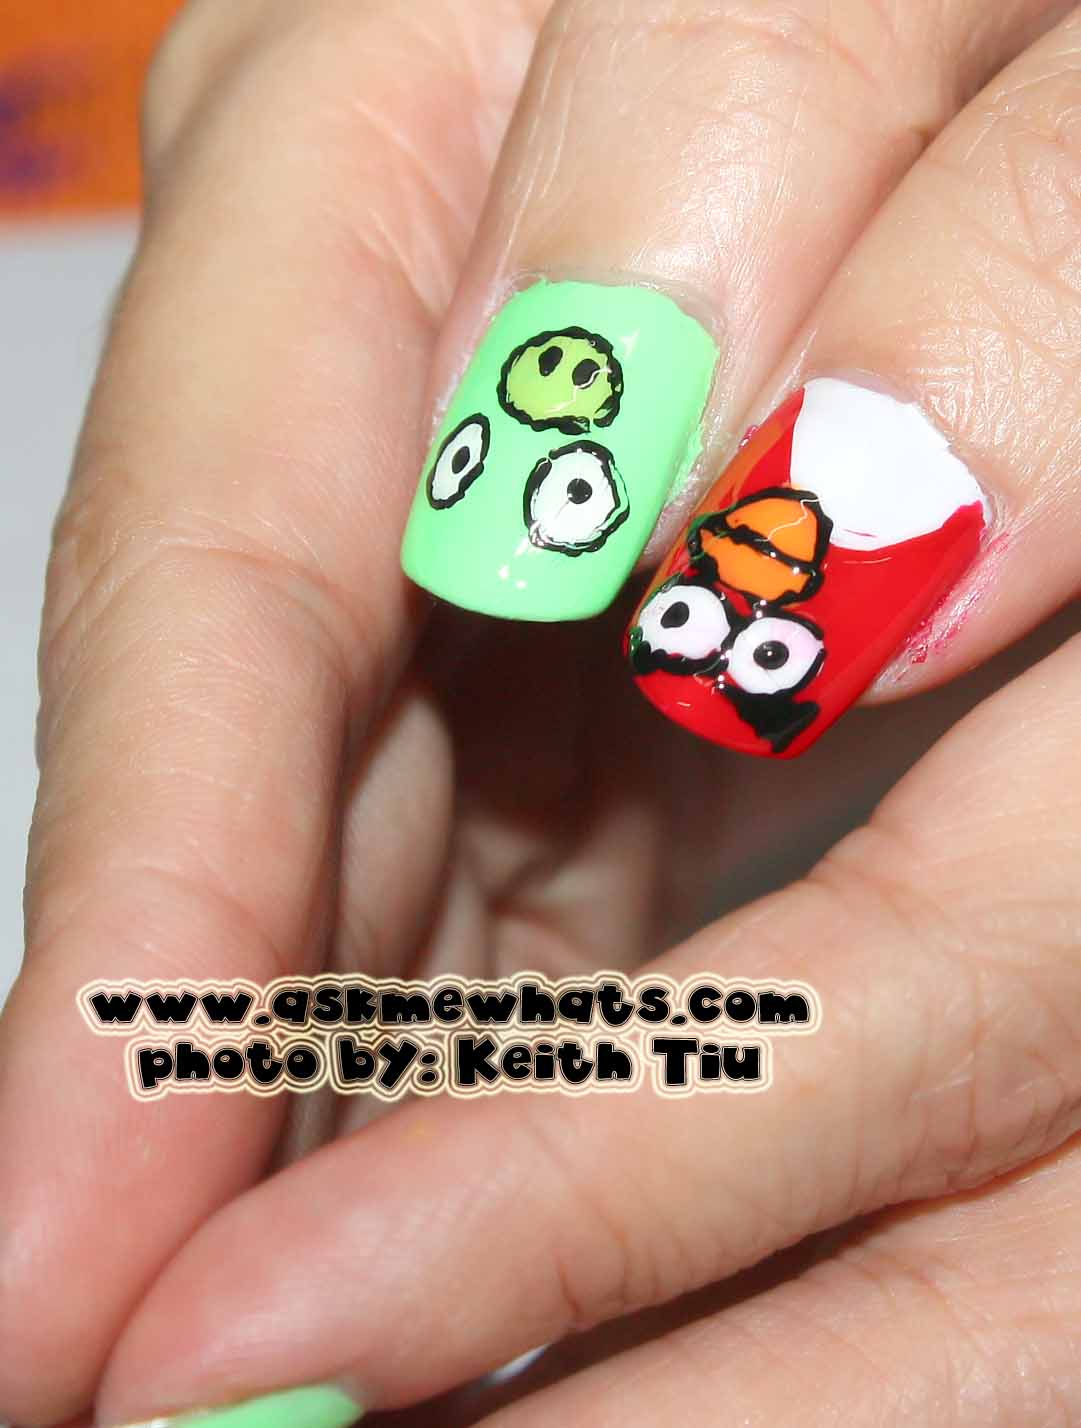
Step 2: "Pigs"
The pigs are the easiest to draw. I used the brush from the nail polish in creating dots for the eyes and nose. 

You can skip this step, but I chose to outline the eyes and nose area.

Step 3: "Red Bird"
Apply 2 coats of Matte White Polish (mine from Nature Republic), let dry. Once the base is completely dry, draw an outline with a thin brush with curve then fill it up with your choice of red polish. I am using Revlon's All Fired Up.

Use the same step as the pigs in creating eyes, use a thin brush in drawing the brows and apply orange polish for the beak. Finish up by outlining the eyes and beak just like the way I did for pigs.

Step 3: "Yellow Bird"
The yellow bird in the game is triangular in shape, I cannot do anything with the shape so I'll just draw the face of the bird on my regular shaped nails! Same with the Red Bird. Apply 2 coats of Matte White Polish and let dry. Use a matte yellow polish to create the yellow part of the yellow bird.
Eyes and eyebrows drawn similarly as that of the pigs. Since the beak of the yellow bird is tinier and has more shape, I opted to use a tiny brush.

Do not forget to outline the beak and eyes for a more distinct appearance.

Step 4: "Blue Bird"
There was nothing spectacular with the way the blue bird was drawn, its the same as the rest of the birds drawn. 
Step 5: "White Bird"
This bird is supposed to be white but I chose to use a grayish polish instead for the eyes to show up. 
Same step on creating eyes. You can choose to give them more expression by putting the dots in different direction. I made this bird looking at the pig on its left side.

Draw the brows with black 2 Way Nail Art Pen

Step 6: "Black Bird"
This is actually my favorite character as this bird blows up! Applied the black similarly as the red and yellow bird. If you find it difficult to curve your nail polish brush, it is advisable to do an outline first so you won't make mistakes.

Instead of black eyebrows, I used orange for the brows instead as it is what the character has in the game.

Drop an orange polish in between the left and right eye for the beak.
Finish up by outlining the beak with black 2 Way Nail Art Pen.

Step 7:
It is vital to make sure the nail art ARE COMPLETELY DRY! It helps to blowdry your nails! Apply 2 coats of your favorite top coat to protect the nail art design you've done.
Time spent: 1 Hour, it's all worth it!
I finally have my favorite Angry Birds characters on my nails!
I did say they were friends at the start for "pictorial purposes", now let the game begin!

I hope you like my childish nail art design!
Do you play Angry Birds?
NOTE: Click HERE for part 2 version of Angry Birds Nail art.
Keep smilin'
Stay happy!


