With my work as an online makeup trainer/skin care trainer and sudden requiements for unboxing or on a more serious side - client meetings. I felt a bit shy at times to show my chipped- very busy cooking in the kitchen nails!
I've done UV Gel a couple of times but since I have eczema, I find this process a bit too drying for my fingers if I do it regularly!
So I head on to Shopee and found some "short fake nails" and gave it a try and loved them so much I repurchased a couple of boxes more!
Each box comes with glue and they stick longer but I an afraid they could ruin my nail bed so I opted to purchase Php7-10.00 nail stickers! They come in nail-shaped sizes and are easy to use! But, it won't last as long as the nail glue so I use this just for a day or 2.
I am so happy to share that I'm back with another gel nail art! I did not take a video of this as I only have 10 minutes to do my nails before I shower my son!
With 10-minutes - the best way to make beautiful nails is to use UV Lamp!
This was done quickly in a flash and I am so happy with the result! By the way, I also shared on Instagram a tip for those who have Contact Dermatitis like I do. I have been taking medications and I've stopped wearing polish for a long time. Now that my hands are healing, I want my hands to look good but NOT suffer!
A quick tip? Apply your polish far from your cuticle! Do not make the polish touch the cuticles because that's where my allergies start! I've noticed doing this application keeps my hand free from allergies. Of course, if you have super bad dermatities - do not wear polish at all!
This tip is perfect for those with mild condition!
I'm back doing nail art once again because as you all know, I stopped when I turned into a mom! Taking care after a Baby, then Toddler is NO JOKE! It is true what most people say, you don't have time for yourself even a single application of nail polish became a chore!
Now that my son is 9 years old! YES! Time flew by so fast, I have the option to do some self-care routine even if I have to wait for wee hours of night when he finally fell asleep! (Not complaining here!)
I think the collection has a total of 6 shades and I got 4 our of the 6!
L-R Artist's Garden, Bleu Iris, Dance with Me, Golden Afternoon
The ORLY Polishes are know to be silky creme shades, easy to apply with the flat brush and dries up easily! If applied correctly, you don't have to worry about chip!
As always, whenever I get a "collection", I try to use all shades proving how a collection really complements each other!
How do you like this look?
ORLY Polishes are available locally at Purebeauty.
(Author got sample sizes but full sized Orly Impressions polishes costs Php395.00 per bottle.)
To our Muslim Brothers and Sisters, you know that we may have different religions (just like how we have different Political Beliefs in times of election.). I want to wish everyone peace, safety, protection and good health!
Happy Eid Mubarak!
I know this art isn't perfect, Look at my moon! My brush is just wonky! But I poured my heart out drawing each nail! Hope you like it!
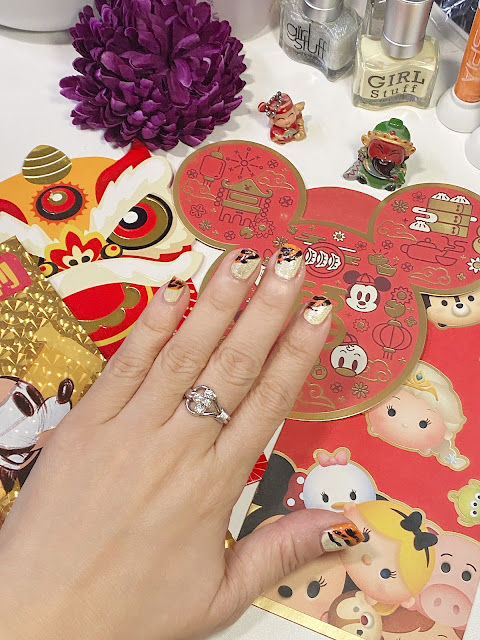
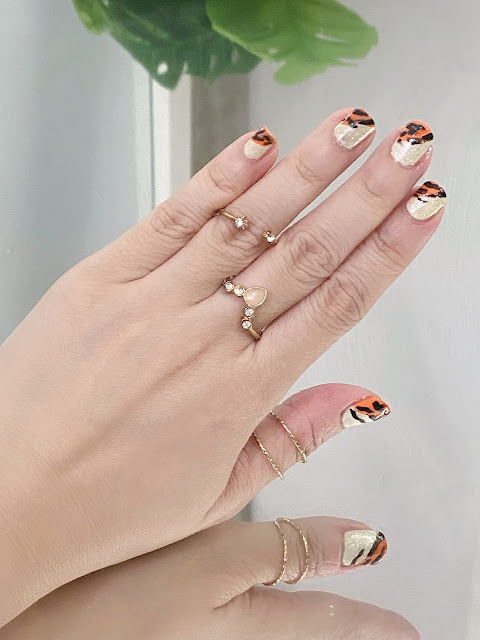
Hello AMW Friends! Happy Year of the Water Tiger!!!
Ah, as much as I’d like to draw a cute Tiger on my nails like I used to a decade ago! I’ve decided to make it simpler and …ahem…more age appropriate!
How do you like this?
My nails aren’t perfect, I haven’t gotten a chance to really buff and clean my nail cuticles —- COOKERIST here LOL! So without further excuse, here’s a better look.
Products used —-
Base Coat: ZOYA Anchor Base Coat
Girlstuff Away from It All - Light Yellow base shade
Ah, I have been so busy to even have time to fix my nails! I thought I have A LOT of time when I don’t need to drive my son to and from school, no need to attend events or go out in general.
Boy was I wrong! I am not complaining though, I am grateful for the opportunity to be able to stay at home with my husband and son as I do the things I love to do at the comforts of my home!
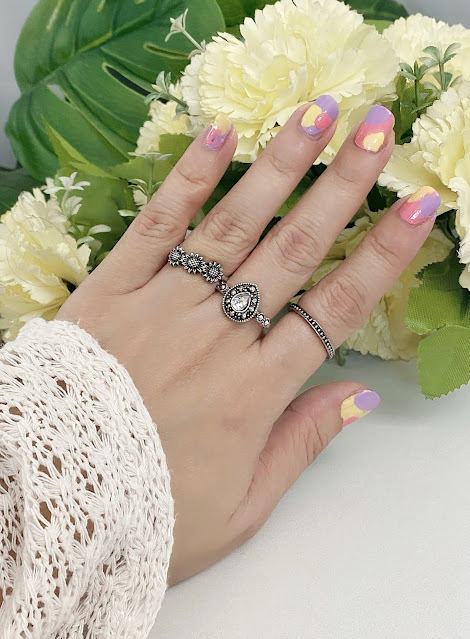
So I recently got new shades of Barry M Polish. They are in pastel pink, yellow and purple! All shades work well even when worn together. Just take a look!
Shades: Raspberry Ripple (Pink) Lemon Sorbet (Yellow) Grape Soda (purple)
Best of all, the Barry M Polishes are quick-drying, very pigmented and the brush is perfect! I have issues on nail polish brushes that do not work well because application will fail on a no-good applicatcor!
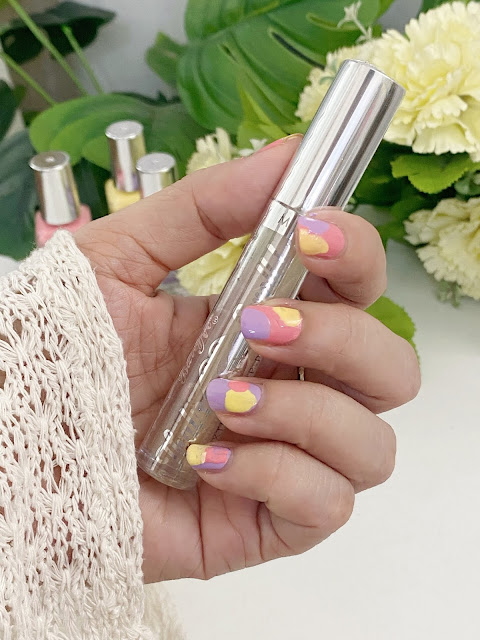
They were actually on 11.11 sale and they extended it until today! Their polish priced originally at Php249.00, these are on 20% sale making it Php199.00 a bottle! Sulit siya kasi maganda promise!
I was able to score this freebie lip gloss for FREE! I think as of the moment of cheecking, they give free card holder for every purchase! I wish you get them for free!
Nail wraps, I never intended to try them since I know in my heart they will never last on me - I cook a lot, wash the dishes and wash my hands multiple times a day! I also do a lot of art activities with my son so that idea of nail art is really out of my mind.
Until one day, I have an emergency meeting with “Big bosses” and my nails were really ugly! In just 10 minutes on hand, I’ve decided to use my STYX Wraps by Luxx which was hidden in my nail product stash for months! I also need to put on makeup and fix my hair so applying nail polish is not an option at that moment!
For a first time Nail Wraps user, this wasn’t bad at all!
I did a less than 15 seconds Instagram Reel for this but this is a longer version for you to understand how to apply Nail Wraps! Again, I am no professional but I am so happy I have a sharp Stationary Tweezers on hand! A must for nail art lovers!
For my quick review, this can actully stay longer even if you do house chores, you just have to make sure the nail wraps fit exactly your nail bed. It must not go beyond the nails or touch the cuticles! Since I was in a rush, I don’t have time to trim the stickers but that is a quick tip for me to add if you want to keep your nail wraps longer.
Also, it helps to apply a top coat for extra shine and “stick”.
Have you tried nail wraps
Do you prefer to apply nail polish or use nail stickers?
The rainy days are really here! It has been raining nonstop for good 6 days to almost a week and the Philippines is suffering in terms of Flood and extreme traffic. I wish things will be better soon not only for our nation but also for other countries.
Since I am still stuck at home - PANDEMIC + STRONG RAIN
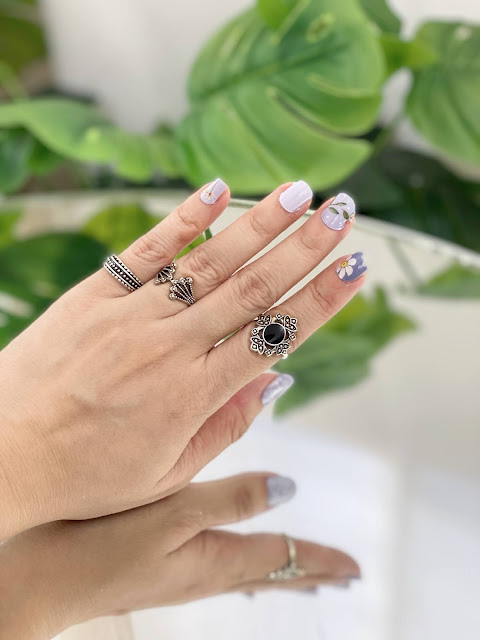
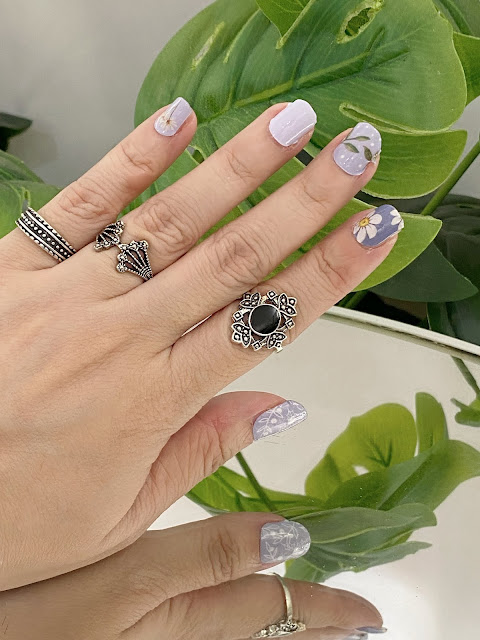
I don’t want my home life to be “shi**y” as they say, so I’ve decided to pain my nails quickly and do a simple nail art. I am inspired by the dainty pieces I own (rings!) so here you go.
It isn’t perfect as I am being disturbed by my 8-year old son while I was doing this!
For the base, I found a perfect color in Cathy Kathy No Soak Gel Polish in shade 13. I used a gel polish underneath so I don’t need some waiting time to be able to draw on top of it!
Whenever I post my nail art tutorials, a lot of you are mentioning how difficult it is to paint your own nails! How in the world can you even do nail art right?
This is one issue I did not bother answering because I felt most of us would rather relax at a nail salon and have someone do our nails! But since the lockdown, for safety, for money savings and sanity! I’ve decided to share this simple and easy-to-follow tutorial because there will be a point (while staying home) we want to look good right? Even if we don’t go out as much, I find myself looking at a well-painted nails with a happy heart!
One of my favorite pick-me-upper nail color is this deep burgundy red from Girlstuff called Bewitched.
But let’s not go crazy, let’s start practicing using a nail polish base and hardener. It is light colored so mistakes are welcome. And hey, this is just nail polish - you can easily erase with a polish remover if you make mistakes! I still make mistakes as of the moment but I just laugh it off and forgive myself! That’s life!
Happy watching! I hope you learn a thing or 2 from me! Stay safe!
The first time I laid my hands on a Barry M product was actually a nail polish which I won from a contest year 2009. (You don't believe me? Click HERE).
Beauty Blogging was way different back then. I don't have access to a lot of international brands so I ended up doing a lot of "Blogger Shopping Switch" (I purchase items for an International Blogger and they shop for me in their country!)
So anyway, back to the brand story! I have tried Barry M polishes and knew they were great! But since the brand never arrived our shores, I just set this aside (at the back of my head wishing and hoping they'll be available locally).
Who would have thought it would happen on a crazy 2020? I mean everything about this year has been bad so hearing such news is such a wonderful bud of leaf peeping through a dried out soil (okay, I'm too negative here but you know what I mean right?)
So a lot of you would probably shrug your shoulders and say: "Meh".
The nail polish and nail art lover in me is REJOICING!
You can easily see it by the look of my face - pure joy as I applied a coat of Barry M Gelly Shine Nail Paint! I got 3 shades to play with and used 2 immediately + a top coat!
Barry M Gelly Shine Nail Paints are indeed high shine (a coat is enough to see the shine!) and it is quick drying! I applied this on a whim while doing an unboxing video and had a busy day ahead so I washed my hand 5 minutes after I applied the top coat expecting them to be ruined! Well, it did not! And I am still sporting this lovely nails while typing this blog post!
Please watch my quick nail art video and see the real SHINE and how opaque these are!
I wish I've done a video on ALL my nail art tutorials because I missed seeing how I fumbled and had a hard time doing all those crazy strokes!
I just knew I love doing it and I love seeing the results! And it's never too late to say: "You're caught on video!" I can't wait to re-watch these when I'm older!
I am inspired to create holiday inspired nails and since it's the Halloween, I thought of creating a cute Mummy nails. Cute because my son checks out my nails and I don't like him to get scared with gory looking nails! Maybe when he gets older, as for the coming years, expect cute ones :D Hope you like it!
By the time you are reading or "watching" this, you probably haven't heard about this or maybe, if you visit a Girlstuff kiosk, that's when you realize: "Oh! You guys have these!"
Because I was told by the brand that they haven't go all out announcing these newest products from because --- these press on nails are painted by REAL nail artists --- one by one so you get really nice quality nail art designs!
As for me, eventhough I was impressed with the designs, I've been very particular with my nails, they may look awful most of the time (hello Boxing and hello Cooking!) But, I know when to say no to products or services I think wouldn't match my lifestyle.
Such as press on nails! How can I work with these? Well, I'll tell you more about it after this short video. I recorded this video to show you how easy it is to apply this product even for first timers like ME!
I was able to wear these Girlstuff Press On Nails for about 4 days, why doesn't it last a week you say? Well, if I wanted it to last a week, I can actually wear them longer, I just felt like my nails was getting longer (yes, they grow fast) so there is a tiny gap below the press on nails making it difficult to "style" my hair! But yes, I was able to cook with them, do my usual workout routine (boxing!) and they stayed! Like seriously STAYED!
How to remove them? I was told just to soak my nails in warm water and gently pry off with a cuticle remover tool and thankfully, nails are still healthy and intact!
Do I recommend using these for busy moms? Yes and NO, yes when you have someone to meet or occasions to attend to and you just don't have enough time to do your nails or to go to a salon. NO - if you are extremely busy with your hands, it will be a bit of effort to have them on your nails for too long! (that's just me) But seriously, these nails are "kick ass" if I am allowed to use those words! They felt weird on first application but on the next hour, it felt like my own nails, I can type really fast with them and do my usual tasks with them without that awkward feeling! Best of all? I've got instant beautiful nails in less than 5 minutes!
Priced at Php450.00 a set, head on to any Girlstuff Kiosk and ask for these! Choose your favorite designs too and don't forget to show me your nails if you were able to try them!
Before 2018 ended, Girlstuff revealed their Holiday Collection called Au Naturel (Back to Basics).
It wasn't the Holiday collection I was expecting but it was definitely one of those pleasant surprises because this turned out to be one of my TOP favorites! (I mean I love all the collection they released but this one is one of those rare moments I was just staring at all the polish shades wondering which one to use first and mind you, I usually make quick decisions!)
So after making sure my fingers are healed (from allergies), I finally did a very simple nail art inspired by one of my favorite shade from the collection called Exposed.
Exposed is one of those gray shades you always wanted to sport but can't seem to find the right ones that would work for your skin tone --- well, this is it! This is a perfect shade for ANY skin tone!
AMW Version: Sparkly Space Gray Nails
I inserted a sparkly element to celebrate the start of 2019! Think about fireworks!
Step 1:
Apply a base coat to protect your nails, I used Girlstuff Nail Revive prior to taking photos, let it dry and go ahead and apply your choice of base color.
I picked Expose shade and applied 2 coats. Wait for it to completely dry which will take approximately 10 minutes max!
Nail polish lovers.
You all know Orly. I don't need to give a long introduction about this brand because we always see them in nail salons and we always get confused on which color to choose for our hands and feet because they always come up with shades that are worthy for our digits!
Then, the decision-making gets even more complicated when they launched The New Neutrals this week! Held at Kitchenails, Robinsons Galleria, I was pampered not only with a nice Pedi-session but also, I was offered my favorite drink of all time --- COFFEE with the help of Costa Coffee.
The new collection is amazing! This Fall 2018 collection includes 6 brand new shades: Cashmere Crisis, Snuggle Up, Fall Into Me, Mauvelous, Seize the Clay and Olive You Kelly (Left to right from photo above)
It was a first for me to try the service at Kitchenails and I love how homey and spacious the place was! I get to be pampered by them using "kitchen utensils" from spatulo to kitchen brushes. And of course, with Costa Coffee to serve us snacks, what could go wrong?
You all know by now that I had my runway walk at the Crystal Bridal Fair wearing a Zandra Lim Bridal Gown for a cause last weekend.
I had my first fitting and I absolutely have NO idea what's in store for me. I was only told by Zandra that she will be putting gold accents so I just played it by ear and created a very simple nail art design apt for this gorgeous gown.
photo by: Jervy Santiago
Please bear with the uneven application, I usually clean up the cuticles the next day when nail polish is COMPLETELY dry!
Inspired by the blushing bride, I picked a nice blush pink shade as base topped with gorgeous shimmers and simple rhinestones that fit the color of my Bridal Gown.