Showing posts with label How Tos. Show all posts

Wednesday, December 7, 2022

How To Use Dr Jart+ Cicapair Tiger Grass Color Correcting Cream


A lot of us are probably in-the-know when it comes to makeup correctors.  Here is a quick test ---

"Which color to use to counteract skin redness?"

3...

2...

1....

Did you get the right answer?
It is green! 

If you didn't get it, it's find.  It took me a while to really understand the concept of color correcting.  I mean not everyone is an artist (like my son!)  So, if you want to correct pimple marks or acne marks that are quite red, you use green makeup to "correct" the area before you apply foundation.  Most of the time, we use correctors like that of a concealer.  But recently, let's say fast forward to many years after, skincare is coming up with color correctors as well.  I haven't found a lot in other brands but I found it from Dr. Jart+.

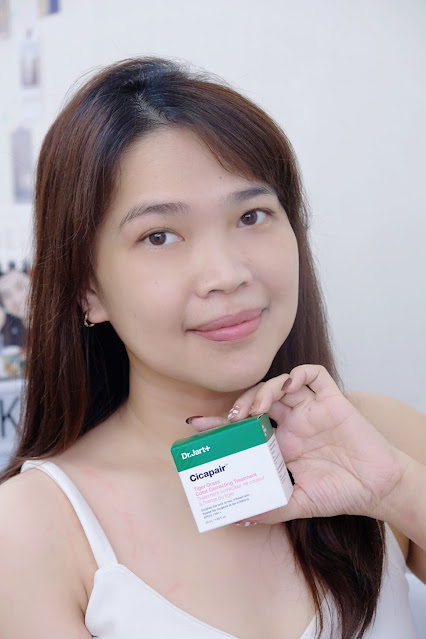
Dr. Jart+ Cicapair Tiger Grass Color Correcting Cream
Approx. Php1,999.00
Available at Lazada

How To Use Dr Jart+ Cicapair Tiger Grass Color Correcting Cream

Dr. Jart+ says ---

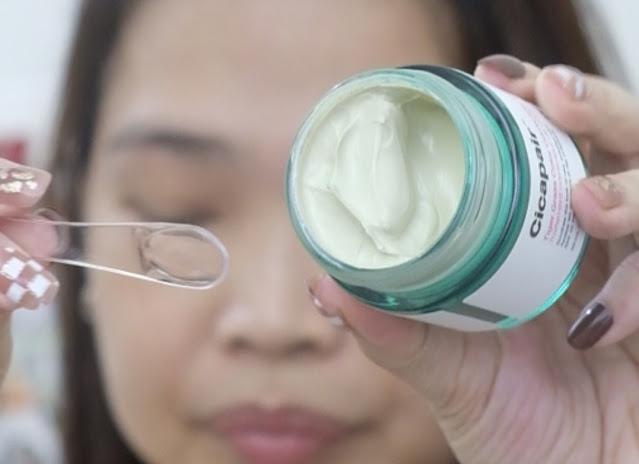
Cicapair Tiger Grass Colour Correcting treatment is the all-in-one treatment that includes a colour-changing capsule within the formula to cover blemishes and restore the look of the skin's strength, healthy and vitality.  It provides SPF22 PA++ protection from UV light, and it forms a dust barrier to protect the skin from the environment while enhancing the skin's viability.
AMW says---

I find this product a bit tricky to use at first because a little goes a very long way.  Putting a lot would make my skin look unnatural with dry patches (as I have dry skin).  Putting not enough won't cover skin's redness.  After trying this product out several times.  I've found the best way.

This product is best to be used after skincare.  This can be used together with your favorite sunscreen but I prefer to apply my sunscreen first then this as last step BEFORE makeup application.


How To Use Dr Jart+ Cicapair Tiger Grass Color Correcting Cream


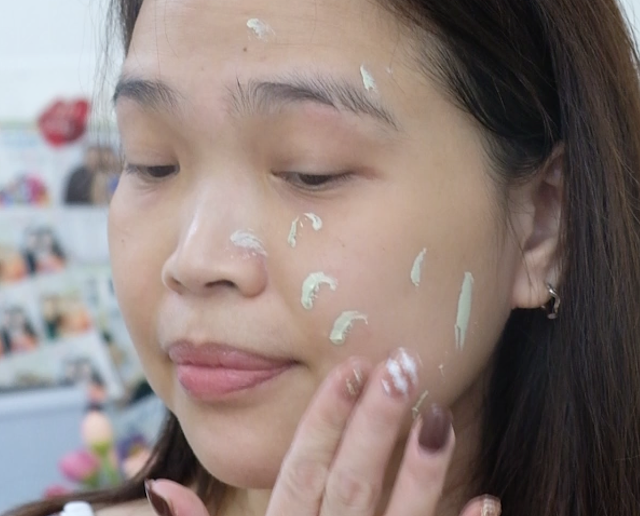
Applying small amounts on key areas is the best way to apply, while skin is still hydrated from skincare, it is very easy to blend this product and add another layer if additional coverage is needed.  I also like to use this as a "spot treatment" instead of applying this cream all over face.  Why?  Because my whole face isn't red to start with, focusing only on red areas will even out my complexion thus creating healthy-looking, glowing skin.

How To Use Dr Jart+ Cicapair Tiger Grass Color Correcting Cream


Monday, November 14, 2022

Powder versus Powder Foundation


What is the difference of Powder and Powder Foundation?
Have you noticed both before buying them or you just take whatever you see based from packaging?

Today, I have the lowdown for you on the differences between a POWDER and POWDER FOUNDATION.  And yes, if you are new to this blog, there are huge differences and usage for both products!


the difference of Powder versus Powder Foundation

To sum it up, powder (also known as pressed powder) contains only powder as an ingredient.  Powder foundation on the other hand can be applied in 2 ways - dry or damp.  

If you are aiming for coverage, then definitely go for Powder Foundation as this is the best product to use for light to medium coverage.  If you want heavier coverage, you may apply the product damp and it works almost close to liquid foundation.  Nothing beats liquid or cream foundation when it comes to coverage but powder foundations work just as well. (Depending on brand)

If you are someone who likes to reduce oil or freshen up, then pressed powder (or loose powder) is the way to go.  


the difference of Powder versus Powder Foundation

With that, here's the magical question:

"Which among the two do I need?"

Wednesday, November 9, 2022

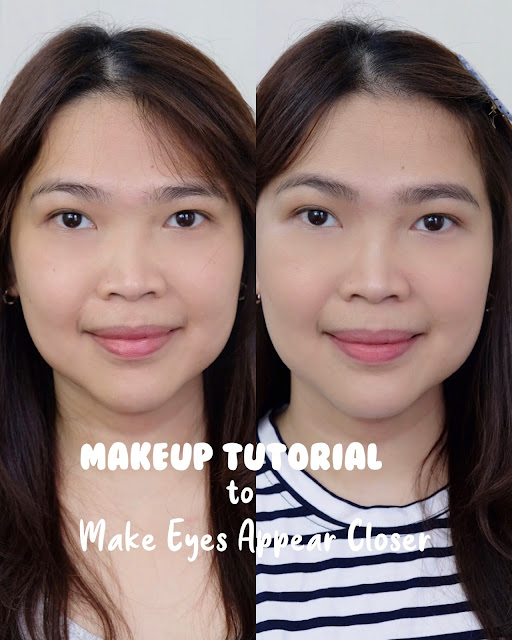
How To: Make Eyes Appear Closer


How to make eyes appear closer you say? Most often, people would use glasses to emphasize the width of their eyes.  Some doesn’t so they would go for lasik eye surgery,  if you wonder about lasik eye surgery cost , the best prices are often found in Dubai (as told by my friend).  The prices starts at $1000 and surgeries like SMiLE Lasik are around $2,800 for both eyes.

As for me, I am here to teach you how to achieve such with makeup.  And you would probably expect me to create a full face makeup or someone like that from theater using various products to achieve this look.

Well, you are wrong!  I have no time to bring out all the products like before - I am a super busy and always in a rush MOM!  So if like me, you can only spare a few minutes to look good, you are at the right place!

TADA!  Can you see the difference?

How To: Make Eyes Appear Closer

A lot of people would think I'd achieve this closer eyes look with eyeshadow, I am proving to you that you can do so with one product - CONTOUR POWDER.  You can even use a contour cream or liquid but that would be harder to blend though it will last longer!  


These are some of the products used to achieve a cleaner look!

Products used:
Eyebrow pencil : @bobbibrownph
Concealer: @makeupforever
Setting Powder: @lauramercier
Contour powder: @tartecosmetics
Big Brush : @avonph (good quality brushes nila guys! 👍)
Small brush to blend concealer : @realtechniquesphilippines (another winner brush brand)


How To: Make Eyes Appear Closer

If you want to proceed to your usual eyeshadow, eyeliner and the whole she bang, you may continue to do so after the contouring step!  

Thursday, October 20, 2022

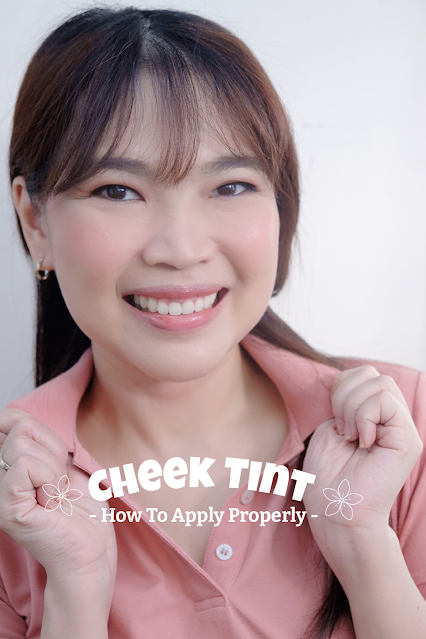
How to Apply Cheek Tint Seamlessly


At this stage and time, there more brands coming up with Cheek Tints!  One brand that I honestly LOVE and collect all the tints are from Benefit.  

Benetint is my ultimate fave and it made me love the brand from the start.  But afterwards, Cha Cha Tint won my heart and I even repurchased many bottles for Professional gigs.  After throwing out a lot of the tints - as a little goes a long way and they expired on me.  I am glad to try one of the newer shades PLAY TINT - God save me, they are coming up with more shades pa!

Benefit's Play Tint is honestly so easy to use.  But easy may be for me, but not for you!  So here's a quick tutorial on how to apply tints (in general) seamlessly!

All you need is a Tint of choice and a STIPPLING BRUSH.

How to Apply Cheek Tint Seamlessly

Steps:

  1. If tints are natural-looking, complete your base makeup first without setting with powder.
  2. Apply cheektint at the back of hand or a dish, grab a few amount of product with your Stippling brush.  Tap excess on tissue, hand or dish before applying straight on cheeks.
  3. Stipple the product on cheeks gently and if the tint is super pigmented, blend out excess using a clean sponge..
  4. If the effect is too much on your cheeks, diffuse the color by adding powder foundation on top.

How to Apply Cheek Tint Seamlessly

This method will definitely create a seamless blush look!  See the result?

Wednesday, October 5, 2022

How to Define Your Lips


Get Ready with Me with  a defined lips!

I have thick lips and wearing lipstick alone is ok but once you go beyond the blurry lip line, I'd look like Angelina Jolie-LIPS in steroids!

So here's my best way to do the defined lips trend.


HOLD ON!
Before you go crazy applying lip liner, remember this tip!

Apply Lipliner on FULLY DRY LIPS - meaning, no need to prepare your lips with lipbalm or lip moisturizer.  The lipliner will slide off easily!  What if your lips are dry???  

WELL, I am the right person to answer this problem because DRY LIPS = ME!


HYDRATE your lips with a non-wax lip balm AFTER lipliner and lipstick application.  You only need to dab the product at the center of your lips to hydrate your lips but preventing it from making lipstick pigment slide off!

Another tip?  You do not need to buy a pair of similar shade LIP LINER and Lipstick!  Close enough shade is goo but feel free to mix and match!  Be creative!

And lastly, watch this quick reel to see how I did this look!

Products:
@lorealparis LipLiner
@rarebeauty Lip Souffle available @sephoraph
@googoo_beauty Balm


What's your favorite lip liner brand?

Keep smilin'
Stay happy!


Wednesday, September 21, 2022

How To Apply False Lashes


Hello everyone!
I've done How to Apply False lashes so many times in this blog but mostly with photos.  

Read: "How to Apply Falsies"

And the application still holds the same with a bit of "upgrade" to make things easier.  We are in this generation where things are easier right?

Aside from methods become easier and quicker, I have to raise a point that lashes are getting better - more natural and lightweight! And let's not forget friendlier price tag!


Kudos to Nippon Esthetic for creating super lightweight and easy-to-apply false lashes!  I am loving this design called Margherita!  I am unsure how many times I wore this on special occasions!


A quick IG Reel on how to apply!
I hope this helps!

Tuesday, March 22, 2022

How to Use Gua Sha For Beginners


Good morning!

I woke up with refreshed skin for a couple of weeks now because I added a skincare routine I didn’t realize would make a difference on both my skin and mental health!  :P

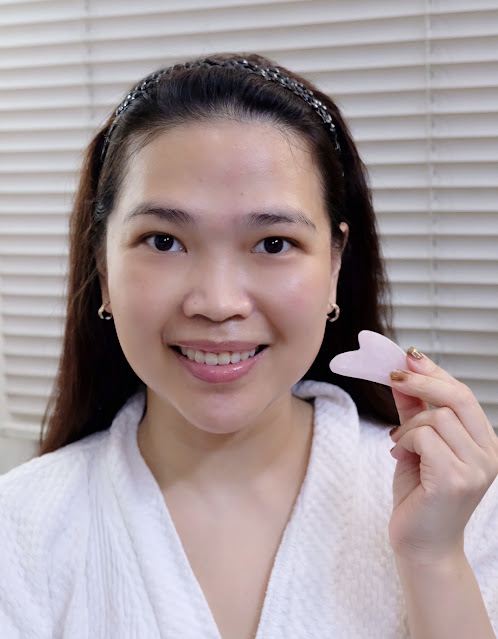
I received this mini Rose Quartz Gua Sha from a PR KIT (sorry I can’t remember from who) but thanks!  It is such a nice yet simple skincare tool and I have been doing this 2-3 x a week.

How to Use Gua Sha For Beginners

Gua Sha is a practice of using a tool to apply pressure and scrape the skin to relieve tension. 


How to Use Gua Sha For Beginners

According to research (source: Here), here are just some of the many benefits of including Gua Sha in your routine:
  • Stimulates circulation
  • Helps produce collagen
  • Softens fine lines and wrinkles
  • Decreases puffiness
  • Decreases inflammation
  • Diminishes dark circles
  • Temporarily tightens skin
  • Brightens complexion
  • Scuplts facial muscles
  • Releases tightness
I noticed so many times when I started my own Gua Sha Journey.  I tend to NOT stick on a regimen if I find something tedious and I don’t see much result.  With Gua Sha, I don’t mind doing this twice or thrice weekly because of the instant relaxation I felt during the Gua Sha massage.  I can feel the release of my tension almost immediately.  I also see instant brightening!  Check out this photo after approximately 5 minutes of Gua Sha.

Wednesday, February 2, 2022

How to: Bigger Eyes with Just an Eyeliner


Lesser and lesser people are wearing makeup nowadays.  “Why bother?” They would say as half of our faces are covered with face masks - thank you OMICRON for coming into our lives this 2022!  #Nothanks

But that does not stop me from using brow products and eyeliner.  Eyeliner was the first makeup tool I used in college (after lipsticks)  and I remembered looking like a fool as I applied it so darkly shaping my whole upper and lower lashline.  

If you studied makeup artistry, you would know that is a huge NO - NO!

To my dear friends who have the same small eyes as I do.  Here’s a trick on how to enlarge your eyes without the need for eyeshadow.  I just used a waterproof pencil liner in dark brown.  Yes, the color makes a huge difference, go for Dark Brown or Dark Gray instead of black!  Black could appear too harsh on a bare eye makeup look!  

I’ll stop blabbling, here’s the half face look.


How to: Bigger Eyes with Just an Eyeliner

Can you see the difference on my eye shape and size?

How to: Bigger Eyes with Just an Eyeliner

More importantly, it appears like I have eyeshadow on because you need to blur out harsh lines from the eyeliner making it appear smoked out.  So the quality of the eyeliner is very important.  I used SilkyGirl Perfect Stay 20 Hour Dark Brown Eyeliner Pencil for this particular look.

How to: Bigger Eyes with Just an Eyeliner

And for you to better understand the trick on how to do it, videos are better right?  Here’s a quick IG Reel I did!  I hope you learn something from me and practice is all you need.

Wednesday, January 5, 2022

How To Choose The Right Base Makeup


As a makeup artist, I was told so many times by my clients that the most difficult part in trying out makeup is to pick or buy the right base makeup shade.

I can’t blame them, as a Pro MUA, that was one of the most challenging thing for me to pick the right foundation or “mix” the right foundationt to suit the skin tone of my client.  Trust me when I say, the huge horror as a make up artist is when clients take photos with “flash” and they end up looking like floating heads!  

Worst, they would complain and tell you their foundation DO NOT MATCH!

After  more than a decade of practice, I’ve got my tips and trick right up my sleeves and I am sharing it here.


Very important tip: Pick 2-3 shades you think is closest to your skintone based from Sales Associate or your own eyes! 

As for this tutorial, I am using Laura Mercier’s newest base - a Tinted Moisturizer that says to give breathable coverage and a diffused matte finish.  This is an oil-free formulation that feels very light on skin and gives good amount of coverage.  This is one of my favorite type of tinted moisturizer to date as most “TMs” tend to be more of a moisturizer with a hint of “color”.  As for Laura Mercier’s version, it seems like an equal amount of moisturizer and foundation! 


Laura Mercier 
Php2,595.00
Available at Rustans
Available in 7 Shades locally


After using this a couple of times here’s my quick review:
  • Nice packaging, squeeze tube with pointed tip making it easy to dispense the correct amount of product.
  • Very comfortable and lightweight.
  • Coverage is nice for a tinted moisturizer, buildable.
  • Does not clog my skin.
  • Works even for my dry patches.  Skin stays hydrated all day.
  • Color stays true, did not turn dark or create white cast.
  • Has SPF20, enough for indoors.  (Please wear separate sunscreen if you stay outdoors).
  • Oil-free, talc-free, sulfate-free.
  • Works for my sensitive skin.

Tuesday, March 23, 2021

How to Style Your T-Shirt


Hi AMW Friends!

How have you been?  Down here in Manila, we are back to lockdown once again which doesn’t give much impact in my life as I have been doing self-lockdown for a year plus!  I only go out on weekends whenever I visit my parents and that started only latter part of 2020.

I felt sad to be honest in our situation but there’s nothing I can do but to continue do my part as a citizen.  Stay calm for my son, keep on whipping out good dishes and study with my son for his homeschool assignments and exams.

On my free time, I create content because I enjoy sharing my discoveries and learnings through the years.  

As for someone who live on T-shirt, I was gifted with a super cute Cooky Pink T-shirt on my partner from a very dear friend Dinna!  Thanks Dinna for the friendship and for always cheering for me!  I appreciate the love!

So she gifted me this shirt on my birthday and I wanted to say - this shirt looks OH-SO-FINE and comfortable even without styling but for someone who likes to wear this in multiple ways, I came up with a nice way to make it look more “dressy”


This tip can be paired with any bottom - pants, jeans, shorts, skort, skirt!  You can even wear this with leggings as the length is just right! Or with Lolita Skirts!


As for my tutorial, I paired this with a demin mini skirt!  I like how it turned out!  


Tiktok Inspired video here!

How do you like this style?

Will you try this?


Keep smilin'
Stay happy!


Monday, March 15, 2021

Instant Face Lift with Makeup


Hi Everyone!

I love doing half face looks to test out makeup and show you the difference.  One particular makeup look got a lot of DMs over my Instagram account , it was the recent photo for my Sace Lady Look.

Because my AMW Friends are important to me, I’ve decided to create and share to you my favorite style of makeup - this!  

Simple with just a few makeup needed and you get whole day fresh-looking makeup - and it stays!  

Uplifted Face makeup look.  Fresh makeup look.  Minimal Makeup look.

Lifted face needed a bit of glow on the cheeks, so I added a subtle glow using a glowing blush.  You’ll know all the products and the effect on the short video below!

Uplifted Face makeup look.  Fresh makeup look.  Minimal Makeup look.


Products Used:

  • Make Up For Ever Ultra HD Foundation Palette
  • Make Up For Ever Concealer Brush
  • Laura Mercier Translucent Powder in Honey
  • Beauty Blender
  • Sace Lady Blush in B02
  • IMAGIC PH Illuminating Powder in Peach Pop
How do you like the final look?

Keep smilin'
Stay happy!


Thursday, October 15, 2020

How to Trim, Cut and Layer Your Hair At Home


It is VERY difficult to cut your own hair even for someone who has haircutting background.  I am in no way a Professional Haircutter but I student haircutting basic a few years back (more than 10 years ago before I studied makeup artistry).  

I originally thought I wasted my time and money but who would have thought a decade after I would put this learnings in good use?

Since COVID-19 happened, I have been cutting my husband's and son's hair since March 2020.  After months of feeling irritated with my dry ends, I have decided to cut my own hair and take a video doing it so you guys can check it out if I can manage to do so.  

I've done a poll and a lot of my #AMWFriends suggested to have my hair cut short but I am honestly enjoying my long hairstyle because I can do a lot of hairstyling practice from updo styles to curling!  I have no one to practice with so I may as well use my own hair! 

Fast forward to my decision to trim and fix the layers of my hair, I have also shared some basic layering tips at the start of the video!  Feel free to watch the basic rules and skip the rest if you are too lazy to watch! But at least, watch the first few minutes because that is where I gave the basic knowledge on layering!  

I know a lot of you are shaking your head saying : "I am NO professional!  I cannot do it!" 

There's no forcing there, you may still go out to a salon and have your hair cut by a professional, it is less stressful that way but I wanted to stay at home, lessen the chances of exposure to the virus plus, I am actually intrigued to know if I can actually do this!  I mean, I was born with a sponge - I just want to keep on learning! 

Without further ado...here's my first haircut to myself and I think I've done a good job!  What do you think?

a photo on How to Trim, Cut and Layer Your Hair At Home

Here's the quick video!  Happy Learning!


If you have done your own haircut (or your family's) using this video! I would really appreciate it if you let me know! :D


Keep smilin'
Stay happy!
 

Friday, May 15, 2020

Makeup for Video Conference #AMWIGtv


As much as I would like to be the first one to say: "Just be who you are!"  "You don't need to put on makeup when you have a video call or conference calls with colleagues or boss, they would understand you!"


A photo of makeup tutorial for Zoom calls or video conference

Well, they would, but let's not forget to still put our best face forward whenever we make video calls!  Same as to what I always believe in, making sure you look good before you face a person means they get the respect they deserve.  Correct me if I'm wrong, some of you may disagree (feel free to comment below), but I believe looking good is not only done to impress other people, but it also made me feel more powerful and confident whenever I face clients or bosses online!

This makeup look I've created is simple and easy to do, I can easily create this look in 10 minutes less and you may opt to create a different version depending on what you're comfortable in.  As for me, the basic requirements are -- Concealer and a bit of color on eyes, cheeks and lips so I feel more alive and can actually transmit energy to the person I am talking to! 

It doesn't hurt to grab a nice top, okay to wear pajamas below but please remember DO NOT STAND UP! :P


A photo of makeup tutorial for Zoom calls or video conference

I hope you can watch this short video and let me know if you enjoyed this!


Saturday, April 25, 2020

How to Use Innisfree My Concealers (Wide Cover and Spot Cover)


Concealing, a makeup step that I have vowed to master after my Make Up Schooling.  It is one of the most difficult step especially when I do bridal makeup!  The concealer has to be strong enough TO COVER EVERYTHING yet, it has to be "subtle" enough to not be seen especially on Hi-Def Cameras and Videos.

After constant practice, I am proud to say, I have mastered the concealing technique and knowing the texture of your concealer that fits your flaws is the best advice I can give you for now!

Since it is lockdown, maybe you can whip out your concealers and practice concealing?  

One of my favorite "friendly-to-your-pocket" yet it "works-on-a-professional level" brand is from Innisfree.  Let's start with 2 of their star concealers in Spot Cover and Wide Cover.

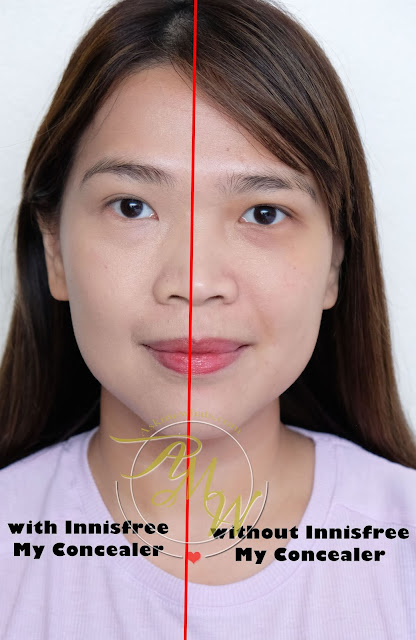
Here's my half face version for you to see how subtle it looks and natural - looks like I'm not wearing makeup at all right? (Please NOD ?  :P)


a photo of How to Use Innisfree My Concealers (Wide Cover and Spot Cover) by Nikki Tiu of askmewhats.com

Let's talk about Innisfree My Concealer Spot Cover, this comes in a pot (like a gel liner) with a free spot cover brush!

a photo of How to Use Innisfree My Concealers (Wide Cover and Spot Cover) by Nikki Tiu of askmewhats.com

The My Concealer Wide Cover is my favorite out of the 2, will share more why later but this comes in a tube with huge doe foot applicator! 

a photo of How to Use Innisfree My Concealers (Wide Cover and Spot Cover) by Nikki Tiu of askmewhats.com

Tuesday, April 21, 2020

Ombre Lips Tutorial #AMWIGtv


We all wanted Korean Gradient lips after watching all the K-Drama at some point in our lives!  I have tried it myself so many times but failed!

YES, you read it right --- FAILED.


I have full lips, dark pigmented lips especially on the outline and my lips are super dry as well.  The effect looks unnatural and most of the time, the lip tint at the center of my lips tends to transfer to my teeth.  


Basta, it was a disaster!

So after constantly trying out various ways and means - I finally found the best and most subtle ombre lips so far!  


As requested by some of you over #AskAMW , here you go!  My version of an Ombre lips!


Subtle, natural-looking and healthy, let me know if you have other tips and secrets!


Watch my IG TV video here uploaded on Youtube.  Please follow me and subscribe as well! 

Tuesday, April 14, 2020

How to Fix Your Own Brows During Lockdown


I haven't looked at myself in the mirror for too long!
So when I finally had my ring light on, busy doing my usual makeup or skincare videos, I had a mirror right in front of me and I was shocked to see A LOT of stray hairs!  


When was the last time I fixed my brows?  


MORE THAN A MONTH FOR SURE!

I mean with the Quarantine period and COVID19 scare, who would have the time to fix their brows?  Not me..that's why I left it bushy for a month plus!  But as much as I'd like to stay up to my feet for this whole lockdown period, I know I'll be anxious and go crazy if I don't do anything else!  


So here you go, finally, I've decided to fix my own brows and since I honestly know how to do it - I'm just too lazy because I always have Benefit Brow Bar to do it for me, I made it!  I was able to film this quick tutorial and I hope you'll learn a thing or 2 from me!


a photo of How to Fix Your Own Brows During Lockdown

A girl can invest only a TWEEZER or Eyebrow Shaver - whichever your heart desires.  

I personally thing plucking is difficult especially for first-timers, I have HIGH TOLERANCE to pain but I swear, I still tear up until this very moment because my brow hairs are thick and they are just F**^^@*&# painful whenever I PULL a SINGLE hair strand!  But, I love how I can control the amount of hair I would like to remove with a tweezer --- and this tweezer of mine - if you are a LONG LONG LONG TIME READER - you'll know it has been with me for more than a decade and until today, it is still the best Tweezer I bought for only Php120+ pesos!  

Now back to eyebrow shavers, I use shavers even for my clients, it is the easiest, most painless method but the downside is, for someone with full brows like myself - you'll end up shaving your brows every after 3-4 days which I don't have enough time of!  

a photo of How to Fix Your Own Brows During Lockdown

But still, because I want this tutorial to be super in depth, I've decided to use ALL methods I could think of (except threading and waxing!) 

Are you ready?

Saturday, March 28, 2020

How to Rejuvenate Stressed Skin


As happy as I look and sound on Social Media, just like everybody else - I am stressed!  

I can't believe I am announcing this, but I really am!

Just like everyone else, I TRY to keep my stress at bay by playing games, watching Korean Series and cooking!  And because my tasks aren't as physically demanding as they used to, I was left with a whole lot of energy til wee hours of the night so I am a LIVING OWL sleeping at 3:00 or 4:00 in the morning!  

My skin is obviously suffering!  

Zits are popping from nowhere, I am starting to see enlarged pores on my cheeks and dry patches (again) on forehead and chin!  

I have to do something, so here's my no fail method to rejuvenate wonky skin!  You won't see instant results, but this made me feel good!


Please subscribe and watch this short video!


What's your plan to save up your skin?

Keep smilin'
Stay happy!
 

Tuesday, March 17, 2020

How to Draw and Fix Messy Brows


It is easy to do brow makeup tutorial when your brows are already shaped and trimmed.  Whether you have them micro-bladed, threaded, waxed or plucked, there are days that your brows seem to be unruly and messy and here's a quick video on how I would handle such brows!


Products mentioned/used:

Keep smilin'
Stay happy!
 

Wednesday, February 26, 2020

How To Apply Eyeliner


Finally, after constantly getting DM's on my IG page on how to apply eyeliner the easiest way, I created a quick and easy-to-follow video tutorial that would help you apply eyeliner quickly.  This is the fail-proof trick because I've been teaching this to a lot of my clients!  This works, you only need to keep on practicing and NOT give up!


Enjoy!


Keep smilin'
Stay happy!
 

Monday, January 6, 2020

How to Conceal Your Pimples #AMWIGtv


Hey AMW Friends!
I've done so many blog pots on concealing pimples, today, I am sharing the ultimate tip using videos!  Enjoy!


Keep smilin'
Stay happy!